8 Metadata and License
In this chapter, we will focus on refining the metadata of our package and ensuring it complies with best practices for package development.
8.1 License File
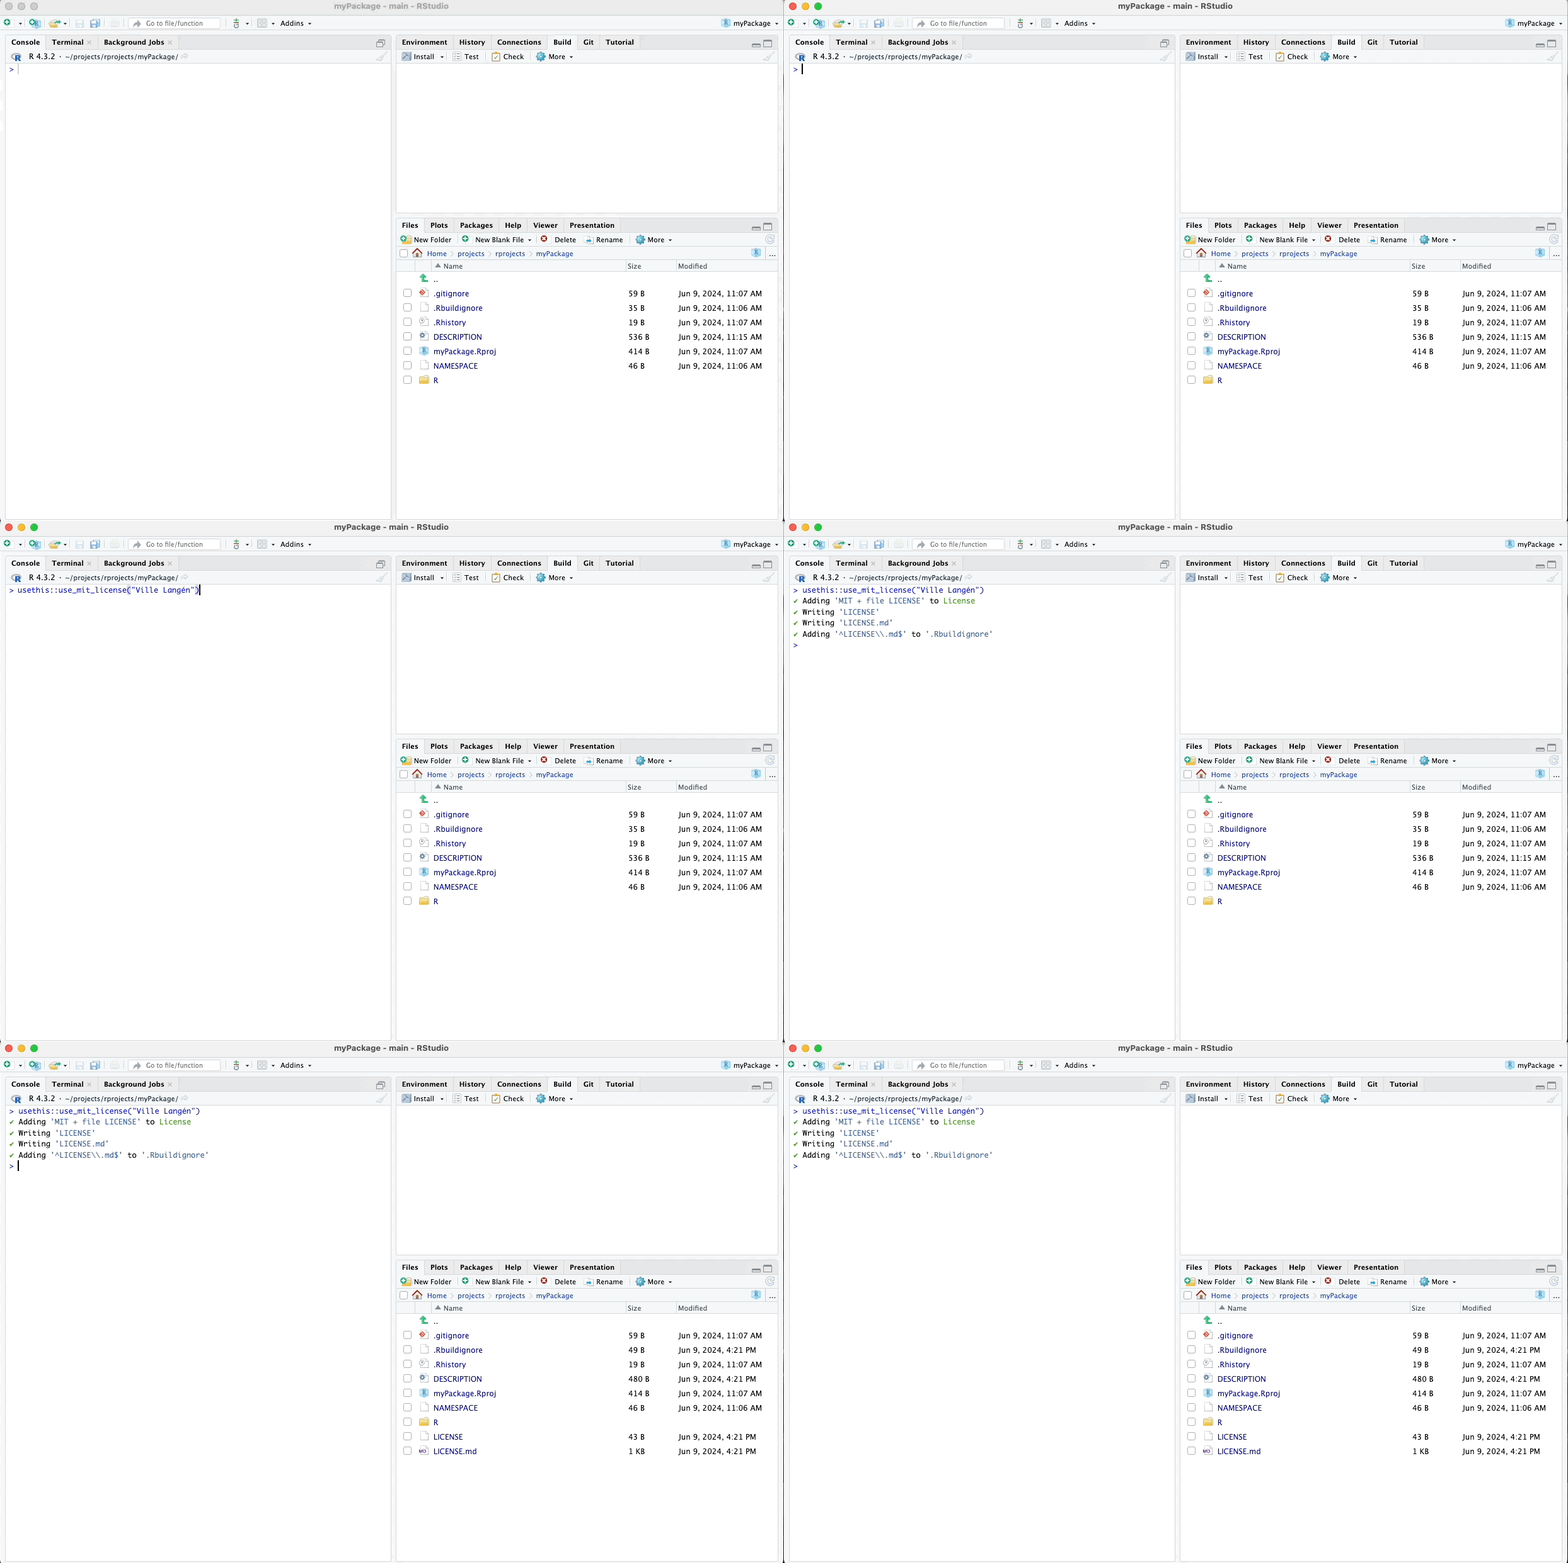
Including a license in our package ensures that users understand the
terms under which they can use, modify, and distribute our code. We can
generate a license file using the
usethis::use_mit_license("Your Name") function, where “Your Name”
should be replaced with our name or the name of the package author. This
function creates a LICENSE file in the package directory containing the
MIT License text.
Please see my animated example below:
8.2 DESCRIPTION File
The DESCRIPTION file provides metadata about our package, including its title, version, author, and dependencies. If you have followed along with this tutorial, you should already have a partially completed DESCRIPTION file. This file includes essential information about your package, such as the package’s name, title, version, author details, and license.
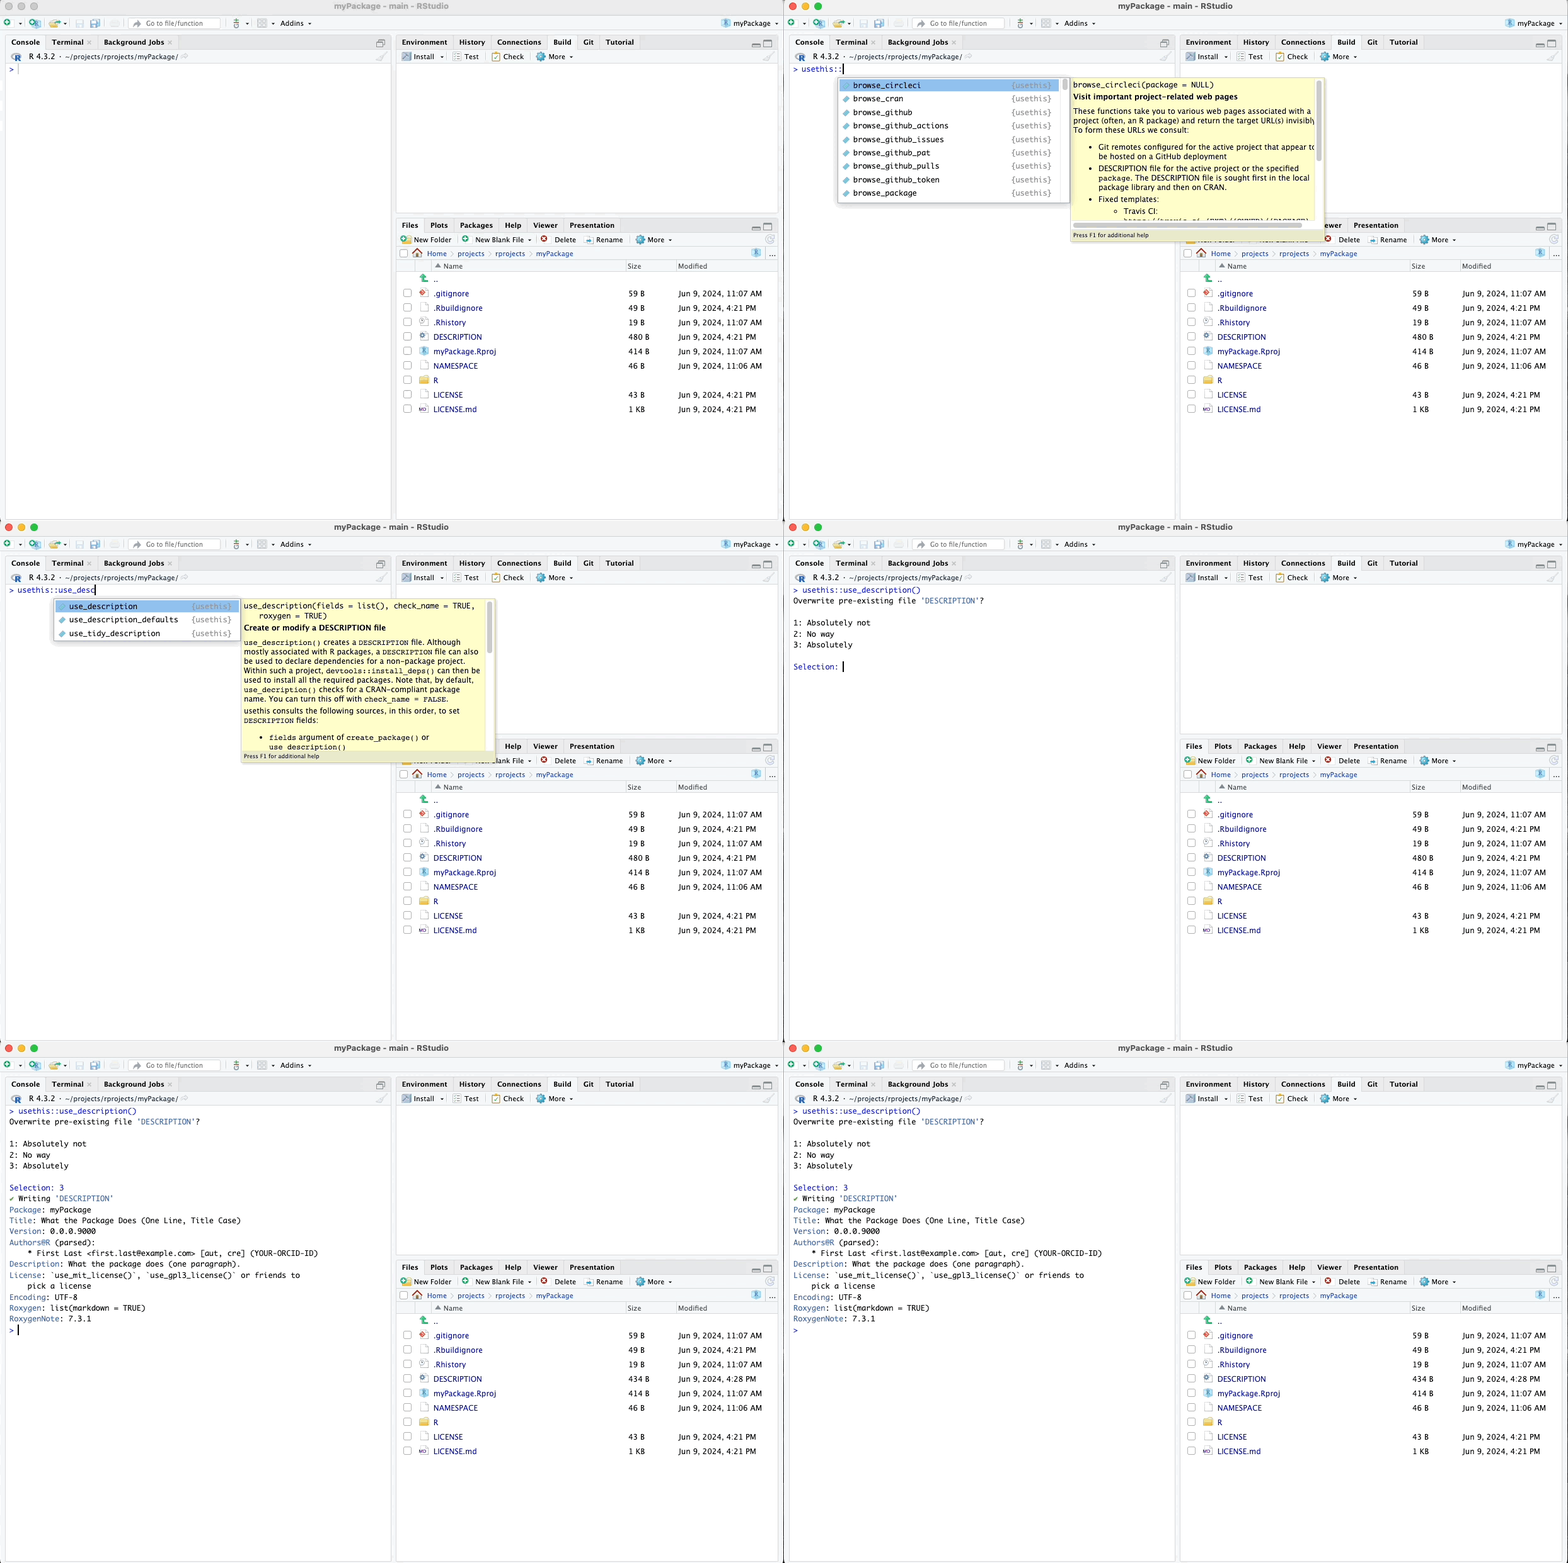
If you don’t have a DESCRIPTION file yet, you can create one using the
usethis::use_description() function. This function generates a basic
DESCRIPTION file, which you can then edit to include additional details.
Please see my animated example below:
For this example package that we are writing, we could use the following DESCRIPTION file text. Click on the DESCRIPTION file in the bottom-right pane and replace its contents with these contents. Make sure to type in your name instead of mine.
Package: myPackage
Title: My Awesome R Package
Version: 0.1.0
Authors@R:
    person("Ville", "Langén", , "first.last@example.com", role = c("aut", "cre"),
           comment = c(ORCID = "YOUR-ORCID-ID"))
Description: This package provides functions to work with movie data and calculate group means based on binary variables. It also includes an example dataset.
License: MIT + file LICENSE
Encoding: UTF-8
Roxygen: list(markdown = TRUE)
RoxygenNote: 7.3.1
LazyData: yes
Imports:
    ggplot2movies
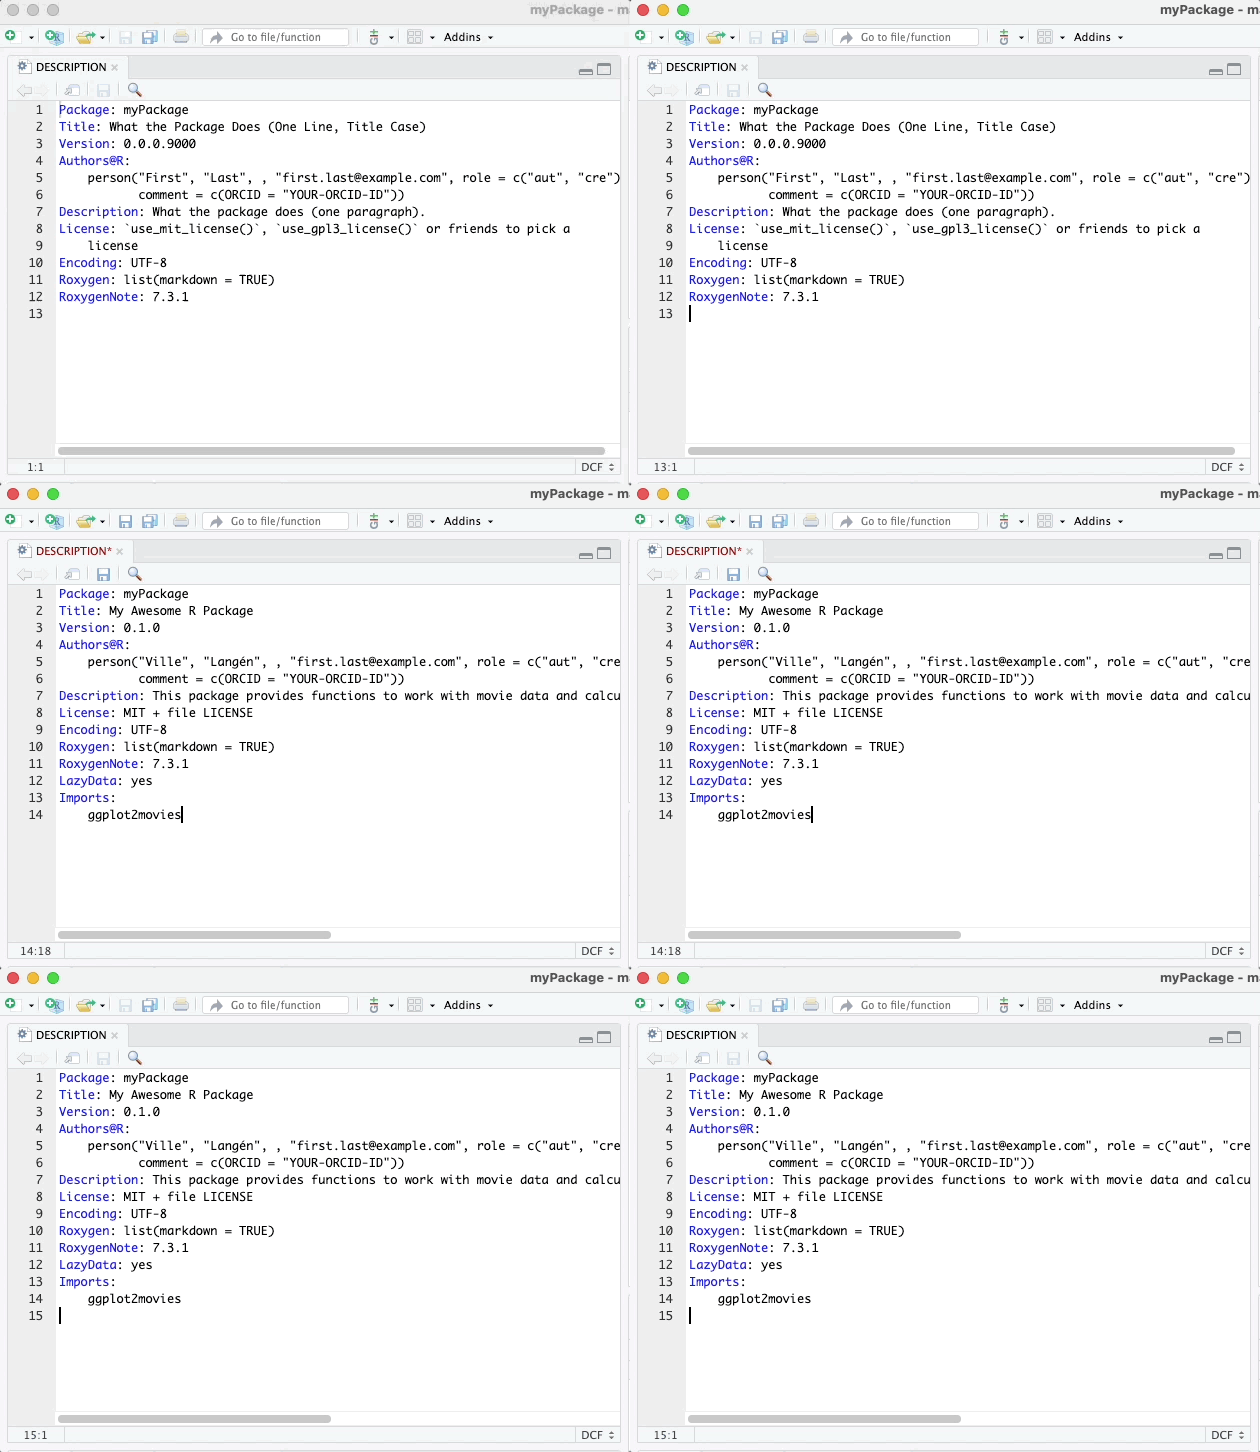
Remember to write out dependencies (under “Imports”), in this case
ggplot2movies, because our function random_movie_recommendation()
will use it.
Mind you that the LazyData: true line ensures that your example_data will be loaded automatically when the library() command is used.
8.3 README File
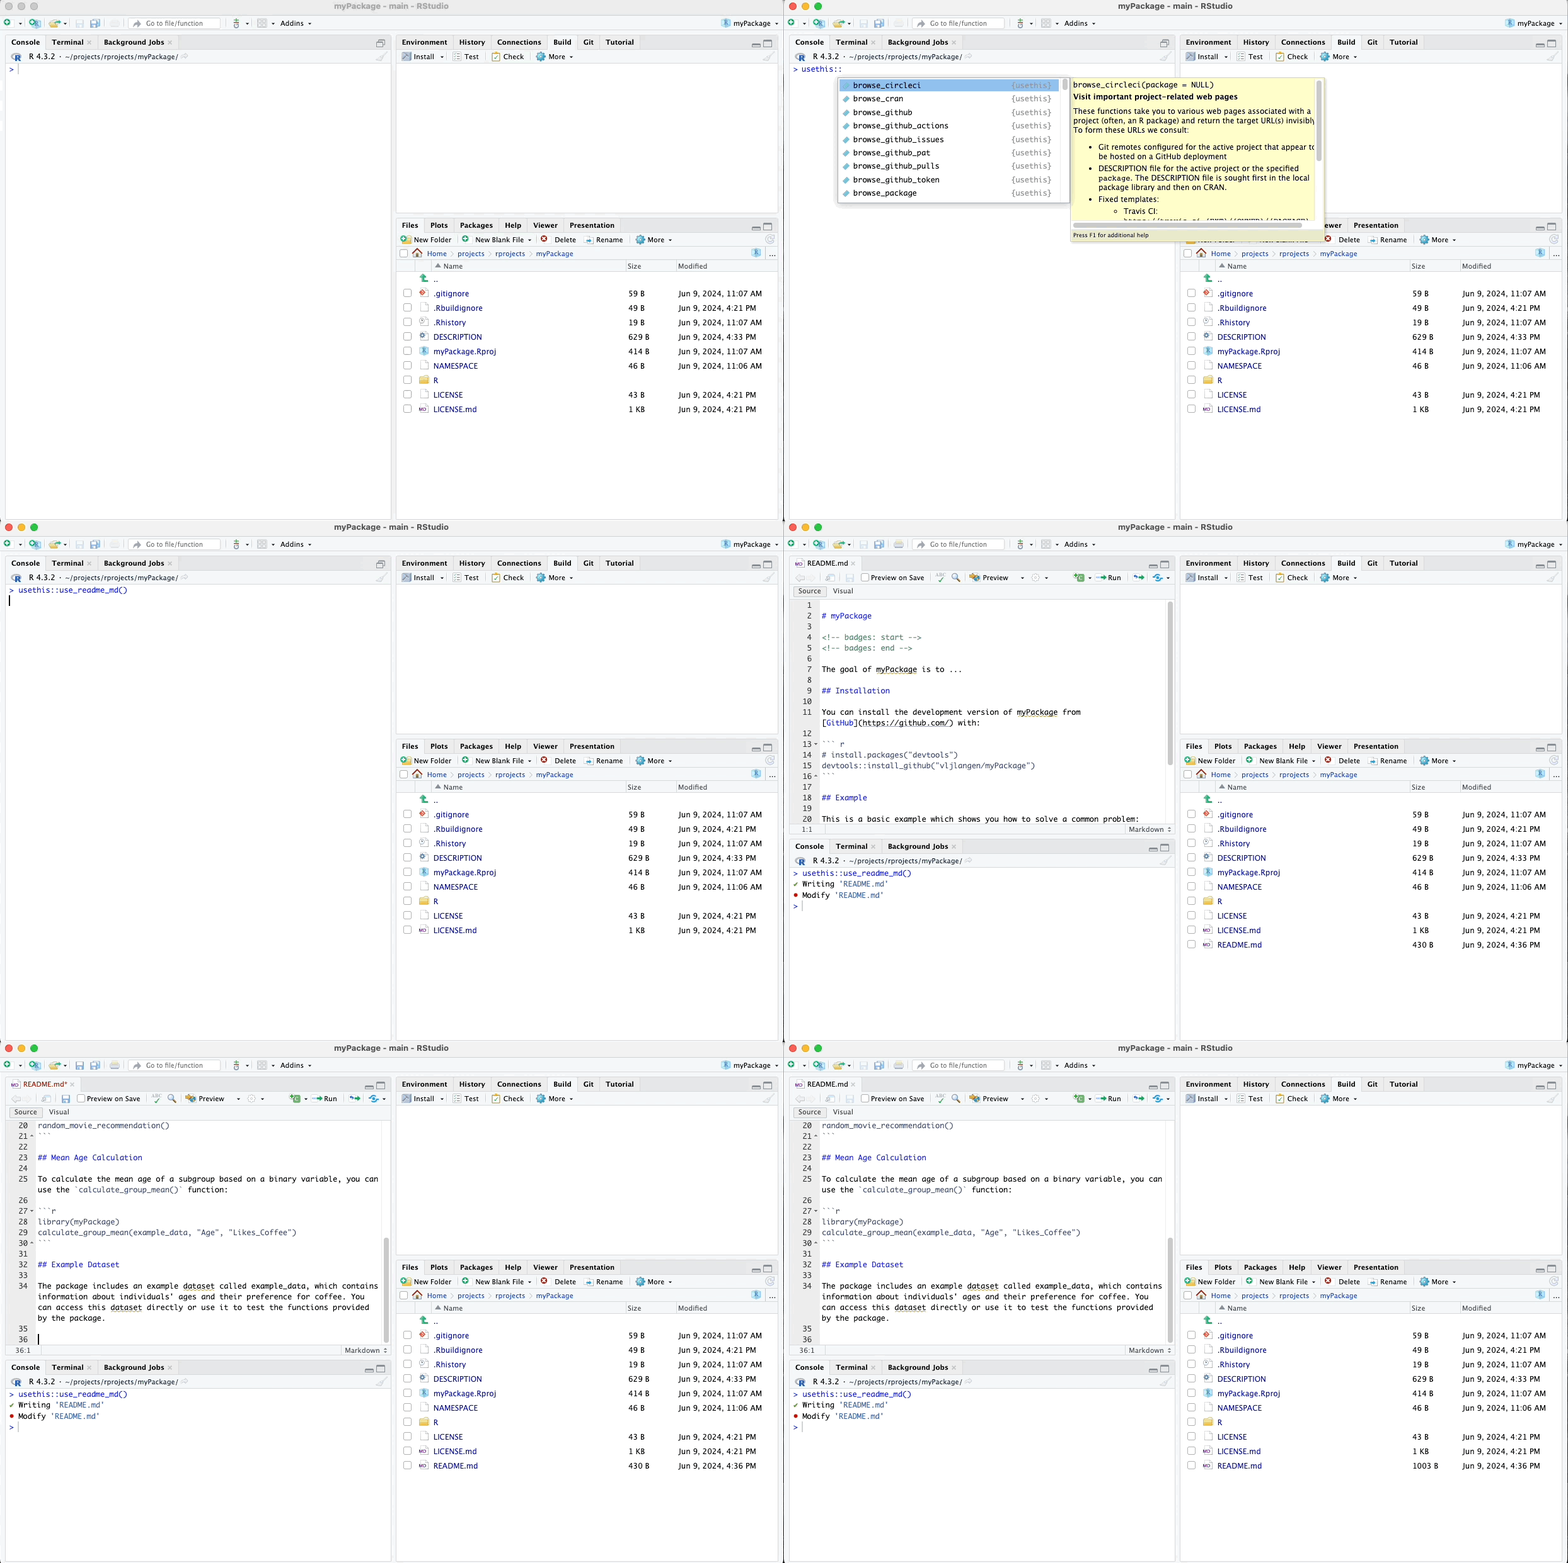
A README file is essential for providing an overview of the package, its
functionality, and how to use it. We can generate a README file using
the usethis::use_readme_md() function. This function creates a README.md
file in the package directory, which we can then edit to include
relevant information about our package, including installation
instructions, usage examples, and acknowledgments.
Please see my animated example below:
8.4 Pushing metadata to Github
After making changes to the DESCRIPTION file, README, and other package files, it’s important to commit and push these changes to your GitHub repository. This ensures that your work is saved and synchronized with the remote repository.
Here’s how you can do it using the upper right pane of RStudio:
- Open the Git Pane:
- In RStudio, you’ll see the Git tab in the upper right pane. Click on it to view your current repository status.
- Stage Your Changes:
- You’ll see a list of files that have been modified. Check the boxes next to the files you want to stage for the commit (e.g., DESCRIPTION, README.md, LICENSE).
- Commit Your Changes:
- Click the “Commit” button. This will open a new window where you can review your changes.
- Enter a meaningful commit message summarizing the changes you made (e.g., “Create metadata and license files”).
- Push Your Changes to GitHub:
- After committing, click the “Push” button to send your changes to the remote repository on GitHub.
Here’s a visual guide:

8.5 Viewing README on GitHub
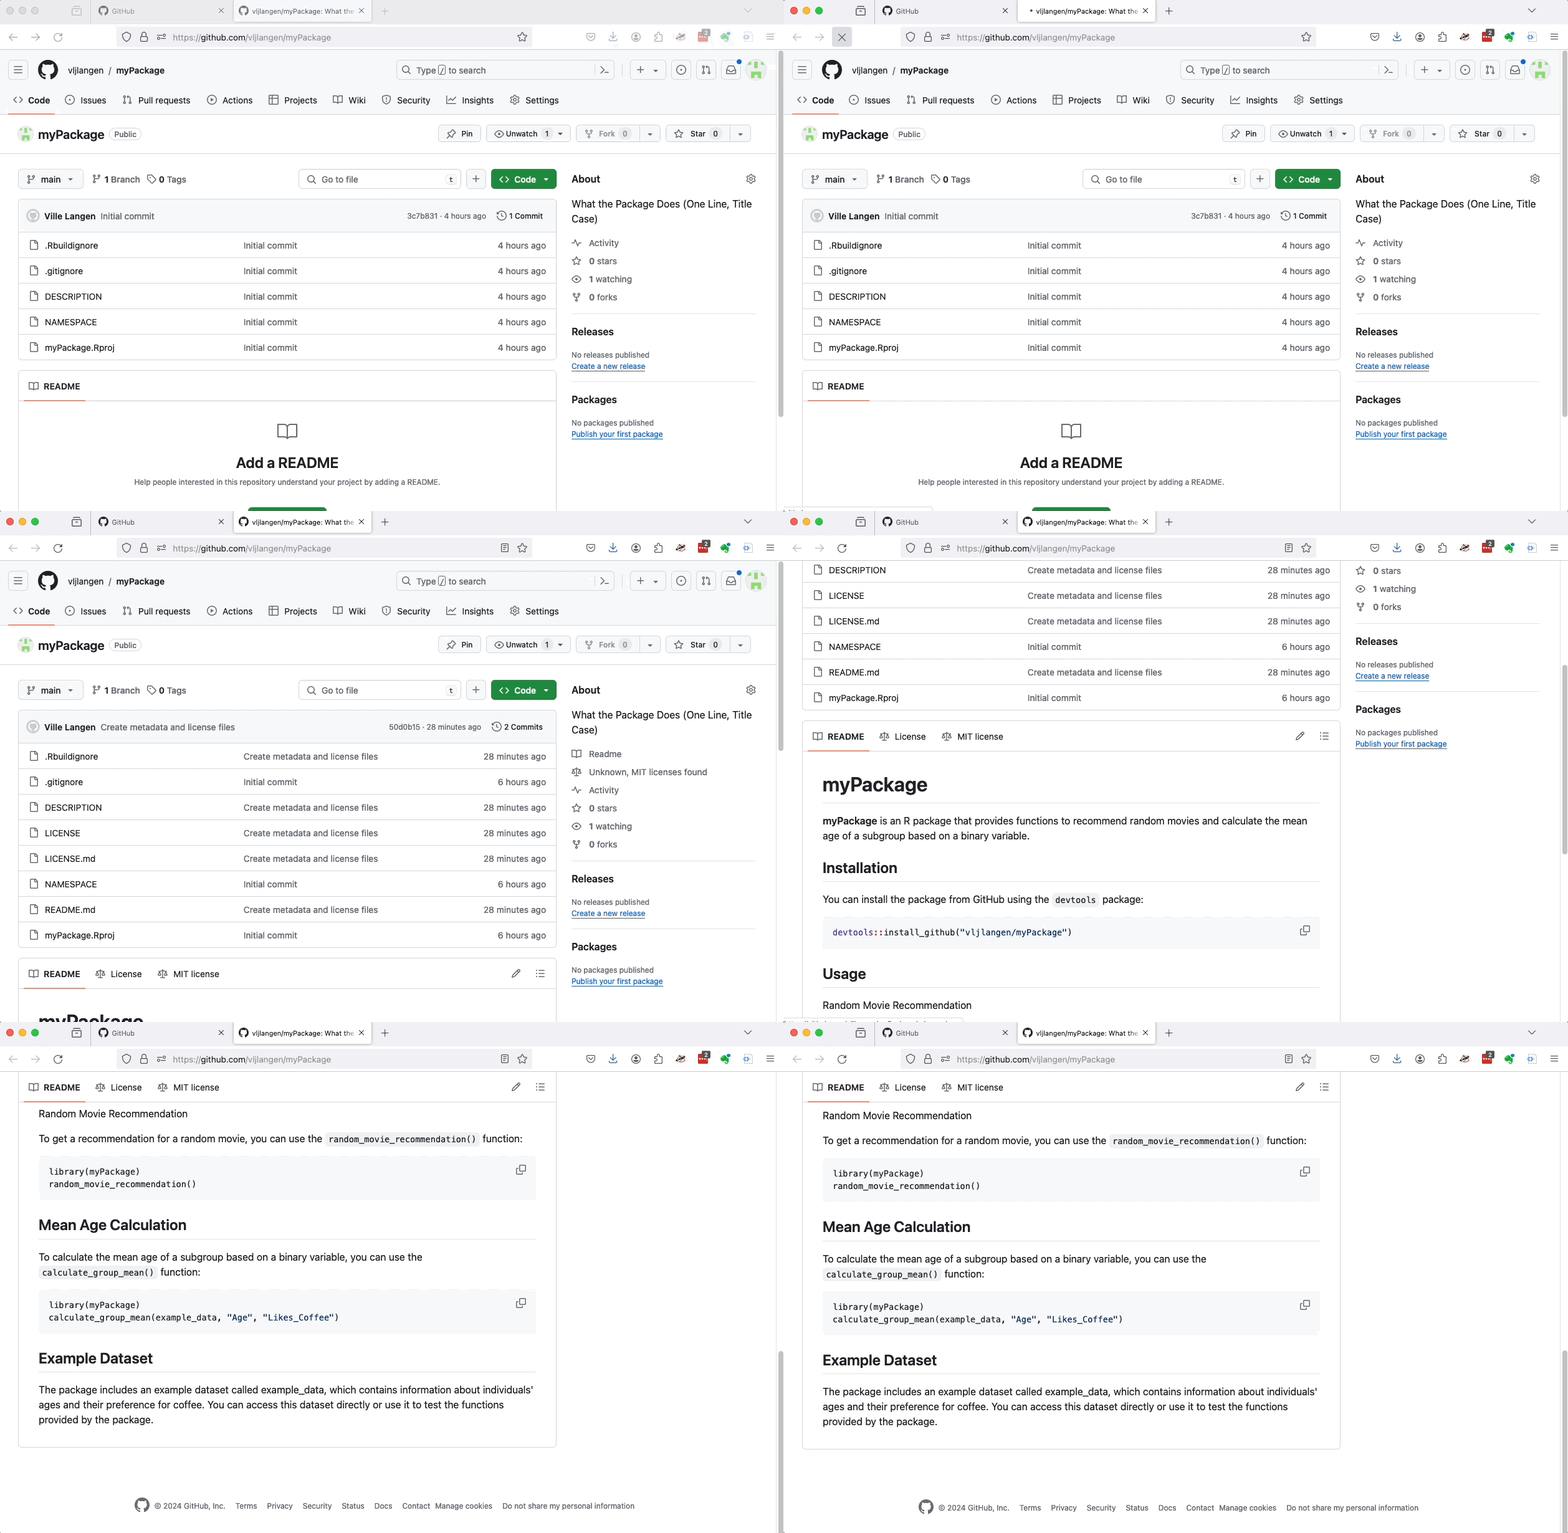
After committing and pushing your changes, you can view the updated metadata files and README on your GitHub repository. Follow these steps:
- Navigate to Your GitHub Repository:
- Open your web browser and go to the GitHub repository where you have pushed your changes.
- Refresh the Page:
- Click the refresh button on your browser to reload the repository page and ensure the latest changes are visible.
- View the Updated Files:
- Scroll down to the file list in your repository. You should see the updated DESCRIPTION, README.md, and LICENSE files.
- Check the README:
- Scroll down to see how the README.md file is rendered. GitHub automatically formats Markdown files, so you will see a nicely formatted version of your README with headings, lists, and other Markdown elements.
Here’s a visual guide:
By addressing these aspects of package development, we enhance the professionalism and usability of our package, making it more accessible to potential users and contributors.
In the next section, we will incorporate into our package the functions and example data that we wrote earlier.
Creating
R Packages: A Step-by-Step Guide by
Ville
Langén is licensed under
CC
BY-SA
4.0